A little maroon table with a weird black lace trim glued onto the side aprons, used for a long time as a little house-altar. It was a little afterthough-ish, though, and far too small to even light a stick of incense comfortably.
The blue thing underneath, by the way, is a glass planter from Ikea. I honestly have NO idea why it's there, but it's been there for like ever.

Enter my friend Sylvan, who recently procured for herself a new bedside table, and needed to find a new home for this old one. "It's such a great red!" I said. She looked at me like I'd grown an ear out of my forehead. Once I got it home and looked at it in a different light, though, I realized that it was not a great red. It was at her place, but not mine. Since the finish on it was a factory spray-job (over MDF), I spray-primed this thing the second I brought it home.
The next step was to actually paint the thing. And until I did it, I had no idea what I wanted to do with it. It just sort of evolved (sometimes that's good, and sometimes not so much). I've been really into the two-tone furniture thing lately - wood + stone, wood + paint, etc. Turns out, I just happened to have some dark brown spray paint, and some in a very light almond color as well.
 |
| plain brown + white |
Which doesn't remotely look like anything except a table spray-painted in two different colors.
 |
| click on these to expand |
You guys know what my favorite paint treatment is, right? Faux bois. A bit of black, a bit of a dark gold, and a bit of water, and the body of this thing was done.
 |
| "alabaster" top! |
The next step was something I'd never tried before. I've done stone textures with sponges, rags, plastic bags, specialized rollers, even bits of torn cardboard...but I've never done veined marble before. I was going for a sort of alabaster look here, with the warm almond-colored base paint; for a first try, I don't think it sucks too badly!
I have an alabaster compote (on the smaller red table in the first pic, actually), and was going for something along the lines of that look.
 |
| OMFG! |
But then, the failiest thing ever happened. The top and faux-bois both came out beautifully, and without a single problem. Since I didn't want brush-marks in my finishes, I opted to clear-coat this thing with spray, which went just fine on the body of this table. But on the top, well...look at the picture. I have no idea why this happened only in a couple of spots, and only on the top. Maybe something was spilled here once; or maybe I didn't clean it as well as I thought I had.

There was nothing to do for it but wait til it dried, scrape off the wrinkled, bubbled paint, and sand it back smooth. Fortunately I didn't have to strip the entire thing - but you can see that whatever happened with the clear-coat went straight down to the original red finish.
Sigh.

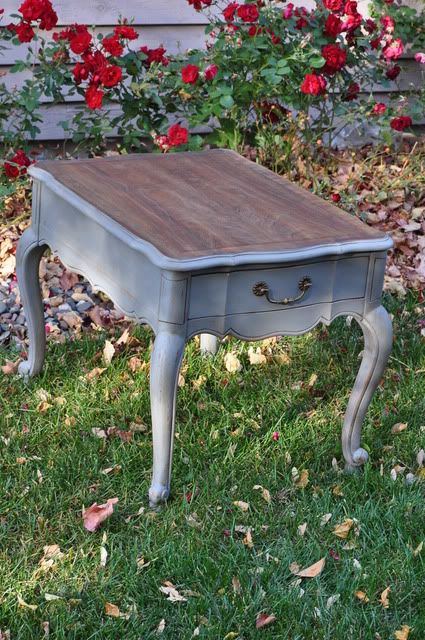
After:

I am IN LOVE with the way this little table came out!!
Here it is replacing that dinky little red altar table in my living room, shining in the morning sun. Heart!

The top, including the alabaster compote. Pretty good match, yeah?

Oh, and what about that dinky little red altar table? Here's it's after:

Later this week: another table,
and more on that Day Sofa cover.
.